Tuesday, April 12, 2016

One Chop, Two Chop, Red Chop, PORK Chop

Dinner For Two: College Edition

One of the hardest things college students have to deal with is trying to keep up on dates with their boyfriends/girlfriends. Everyone knows money can be tight so sometimes date nights consist of cooking at home. Unfortunately, sometimes its just the same recipes and same routines so I decided I needed to spice things up and try a brand new recipe. Because I am ballin' on a budget, this recipe was perfect because of how cheap everything was once it came down to it. 

I, for one, can not wait to move back home when my parents will be paying for groceries and I can actually eat decent food (wink wink, mom & dad)! So for this post I will be sharing an easy recipe almost anyone can do! Lemon Basil Pork Chops with Oven Roasted Potatoes and Broccoli!

This recipe was super easy and also it is one you can make earlier in the day if you have afternoon classes. I chose to make it 2 hours before I cooked everything so I knew everything would be marinated perfectly. 

Below are pictures of everything marinated before being cooked


Lemon Basil Pork Chops

Ingredients:
  • 2 Pork Chops
  • 1/2 cup of fresh basil, chopped
  • 1 1/2 tablespoon of garlic, minced
  • 1 1/2 tablespoon of lemon juice
  • 1 tablespoon of olive oil
  • Salt and pepper (around 3/4 tsp each)
Directions: 
  • In a small bowl, combine basil, garlic, lemon juice, olive oil, and salt and pepper to taste.
  • Put your chops on a plate and generously coat both sides with the mixture.
  • If you are making them right away, you must let them sit before you start cooking. I recommend 25 minutes just so all the juices and flavors blend well. 
  • Over medium-low heat in a sprayed skillet, start cooking the chops. They are going to take a little bit of time because of how thick most of them are.
  • You don't really want to see any pink, but if you are fancy and have a kitchen thermometer make sure they are around 145 degrees!
  • For mine, I cut them down when i could tell they were going to be close to done but then threw them back in the skillet over medium heat.
  • Once you think they are done, Enjoy!

Oven Roasted Broccoli 

Ingredients:
  • Broccoli, enough for two people
  • Olive Oil
  • Salt & Pepper
  • Garlic, minced
Directions:
  • Since I made this ahead of time, I mixed my ingredients in a tupperware container.
  • I didn't post any measurements because it really all goes by preference for this one.
  • Mix all your ingredients together and set aside once you are ready to make.
  • Once you are ready to make, preheat the oven to 400 degrees.
  • On half of a baking sheet, lay out the broccoli (save the other half for the potatoes)
  • Bake for 30 minutes or until desired temperature. I prefer mine a little golden brown so I will leave mine in for the full 30 minutes

Oven Roasted Parmesan Potatoes

Ingredients:
  • 5 small red potatoes, cleaned and cut down to small pieces
  • 1 tablespoon of basil
  • 1 tablespoon of oregano
  • 1 tablespoon of garlic, minced
  • 2 tablespoons of olive oil
  • parmesan cheese, as much as your little heart desires :)
  • salt and pepper to taste 
Directions:
  • As stated before, I also made this in a tupperware container so it was ready when I wanted it.
  • Mix all the ingredients together and add as much cheese or little as you would like. 
  • Your oven should already be preheated to 400 degrees 
  • On the other side of the baking sheet that the broccoli is on, lay out the potatoes evenly
  • Baked for 30 minutes just like the broccoli. 
  • Be sure to to check up on them and after the time is up if you still want them more golden, leave them in a little longer.
*While Broccoli and Potatoes are cooking, I advise you to mix them around so all sides get cooked evenly!*


As you can see, this meal can be pretty easy and prepped before so you're not rushing around dinner time. Please let me know if you have any feedback for this recipe, I would love to hear about everyone's take on this!

Please be on the look out in the upcoming weeks for my Best of Tuscaloosa Post! As you all know, I am graduating in 24 days and would love to give Tuscaloosa a proper goodbye with a post dedicated to the city that was my home for the past 4 years. The categories will be:

Best Burger
Best Late Night Studying Snack Spot
Best Happy Hour
Best Wings
Best Pizza
Best Restaurant for a nice dinner
Best International Food
Best Sushi
Best Bar
Best Quick-Casual Restaurant
Best Drunk Food (sorry mom)
Best BBQ
Overall Favorite Restaurant

If you would like to nominate anyone please feel free to email me and let me know! Thanks again for reading and I hope everyone enjoys the last few weeks of school!

XOXO, 
Caroline 

Monday, April 4, 2016

Let The Countdown Begin...

I really don't want to TACO 'bout it

Well, in 33 (hopefully long) days I will be graduating from The University of Alabama (roll tide am i right?). And as the heading says, I really don't wanna taco bout it. My pun is completely intended because this weeks post I will be sharing a step by step recipe to make taco stuffed peppers! This recipe takes a little bit of time for your average college meal, but i can assure you it is totally worth it if you are willing to sit there patiently while you wait for everything to cook...

Before I begin, I just want to apologize I haven't been posting as frequently as I would like because school is ending and I'm just an emotional ticking time bomb. So unless some miracle happens and I fail a course and get to stay here, just be aware of my every move in the next month. (Just kidding mom and dad I am not going to fail even though I tricked you guys so good on April Fools and thought you were gonna fly down to kill me, I am still doing fine in my classes)

As college ends, I can't wait to start sharing recipes that an average young adult would like to make. Balling on a college budget has been pretty tough especially when I am in the mood for steak and high end classy recipes almost every day.... Fortunately, this weeks recipe does not break the bank to much and you won't feel super guilty about eating it. (unless you're like me and smother it with cheese and sour cream)

Taco Stuffed Peppers with Ground Turkey

Ingredients:
  • 2 Green Bell Peppers
  • 1 lb of Ground Turkey
  • 1/3 cup of chopped sweet onion
  • 1 roma tomato chopped
  • 1 cup of brown rice, cooked
  • Taco seasoning packet
  • Shredded cheese (I got the Mexican fiesta one because I felt it was most appropriate for my one woman fiesta) 
Optional Ingredients for the side:
  • Salsa
  • Guacamole (obviously homemade)
  • Sour Cream
  • Hot Sauce
So like I said earlier, I have easy step by step directions with pictures to go along with them. So first things first- Cook your rice and set aside. While the rice is cooking bring a large pot of water to a boil and then put your peppers in. Make sure before you put the peppers in you cut a hole in the top and take out all of their guts. Let them boil for 5 minutes. Then preheat your oven to 350 degrees. 

(I've literally never seen more beautiful peppers in my life and had to make this photo extra large because I wanted to make sure you soaked in its beautifulness)

Next, in a large skillet, brown the ground turkey. Once you think its close to done, add the onions and then the tomatoes.
(Added Onions)
(Added Tomatoes)

The next step is very easy- Follow your taco packet!!!! It is going to tell you to drain the extra juice and then add the packet then 2/3 cups of water. After you brought it to a boil and then let it simmer, add the cooked rice. 
(Added Cooked Rice)

By adding the rice, it will make sure it thickens up even more so the inside of your pepper isn't too gooey. Lastly, and after its mixed together, add cheese. I know I didn't give a specific amount but thats only because some people don't like that much cheese (I know, weirdos?) 


Now its time to stuff your peppers! 
Fill to the top tightly and put them in a shallow baking dish (I greased mine just to make sure they didn't stick). Once they are filled, top with even more cheese!

Bake in oven for 25 minutes at 350 degrees!


Like I said above, add what ever kind of toppings you like on the side that you would normally top a taco with! When making this, you will have extra meat (every college kids fantasy: Leftovers) so you can either add extra peppers to stuff or save it for lunch tomorrow!

I hope everyone enjoyed this recipe and let me know your feedback if you try it or let me know if you ever have any questions about one of the recipes! In these upcoming weeks be on the look out for my official Top Places To Eat in Tuscaloosa post. It will be my farewell to the city that has been my home for the past 4 years! (sorry to be sentimental but come on, it is sad)

Thank you for reading and please send suggestions!
XOXO,
Caroline 

Monday, March 21, 2016

A Love Letter to Wawa & Spring

Spring has Sprung!

Hello my long lost friends! It has been way too long since I posted and I wanted to apologize for that! My original idea for todays post was to recap about Spring Break and all the great places to eat in Clearwater Beach, FL. Unfortunately the places that I enjoyed, I forgot to take pics & the places I did take pics..... food wasn't too great it just looked really pretty.

Fortunately, there was one great picture I took from spring break of a delicious meal that could not compare to anything. In fact, my love affair for this food started when I was just a little girl. No one gets me like this place does and for that, they will always have my heart. For those of you reading from the mid-atlantic area, you might of guessed who this love note is for. 


Dear Wawa,
There is nothing I could ever compare you to. Your bright and shining red sign welcomes me every time I pull into your lot. 
When I walk through your doors, I feel at home. I'm not gonna lie, you sometimes overwhelm me and make me nervous, but thats just because I like you soooo much and want to make sure I order the perfect Hoagie.
You never disappoint me, Wawa. Whether I do a quick sweep through or take my time ordering at your screens, your options are endless. I mean, come on, what other convenience store has a Hoagie Festival? 
But Wawa, I just want to remind you that I will never abandon you. I know these past four years have been tough considering you haven't made it to the south (Florida doesn't count, they're east coast). But I just want to reassure you, come May, I'll be back home making trips far too often and gaining so much weight just so we can make up for lost time.  
Between your fresh coffee, amazing fresh food selections, and hoagies, you will always be my go to quick meal stop.
Wawa, don't listen to the haters... You're not just a Gas Station, you are so much more than that. In fact, you are my whole world.

Sincerely, 
Girl that grew up a mile from Wawa University 

If that doesn't give you goosebumps then you are honestly missing out. I know I'm a romantic and Wawa just gives me the feels. But on to a new recipe! So when I think of Spring, I think of fresh food and veggies and fish. Don't ask me why, its just how it is. So this week, I did a spin on Salmon & Zucchini. I found these recipes on Pinterest & the outcome was outstanding :) 

Cilantro Honey Lime Garlic Salmon with Parmesan Lemon Zucchini

First and foremost, take a deep breath. I know it seems like a crazy combination but trust me, your taste buds will thank you later... 

Cilantro Honey Lime Garlic
Ingredients: 
-1 filet of Salmon
-1 tablespoon of chopped Cilantro
-1 1/2 minced garlic cloves
-1 tablespoon honey
-1/2 tablespoon lime juice
-1/2 tablespoon olive oil
-Salt & Pepper to taste

Directions:
-First, preheat your oven to 400 degrees
-Make sure your salmon is dry and then brush it with the olive oil and salt and pepper to taste.
-Place salmon on piece of foil and fold up edges tightly around to make sure the juice will stay in tight
-In a bowl, mix together the honey, lime juice, cilantro, and garlic. Cover the piece of salmon with the mixture
-Bake for 15-20 mins. I did 17 minutes and it came out perfectly.
-Scrape the fish from the foil and it will leave some of the skin behind, ENJOY

Parmesan Lemon Zucchini
Ingredients:
-1 small zucchini 
-1 tablespoon of butter
-1 garlic clove, minced
-lemon juice
-parmesan cheese
-basil
-salt and pepper to taste

Directions:
-First, melt the butter in pan and throw the garlic in the pan as well.
-Next, put zucchini in pan with salt and pepper and keep turning so it doesn't burn
-Every so often, sprinkle parmesan cheese and lemon juice over top
-Add some basil too for extra flavors
-Cook until golden or until your liking
-When finished, sprinkle some extra parmesan cheese over top and ENJOY


As you can see, I served mine with some brown rice. All the different flavors really mix well together. This recipe is a prime example of using a variety of flavors that end up working really well together. It may take some experimenting, but before you know it, you will be a flavor master. 
I hope you all enjoyed this post, especially my ode to Wawa. Make sure you keep checking in for new recipes! And, as always, I'll never turn down a suggestion.

Everyone, Be Safe & Enjoy Spring!

XOXO, 
Caroline


Friday, March 4, 2016

Meet The Brunchfest Club!

The title of this post is me attempting to be funny and spin off the breakfast club but as you can tell, fail. Anyway...... This is the second post this week so you're welcome and since I'm feeling awesome, I am sharing three easy recipes that go hand in hand with a delicious Brunch. When most people think of brunch its mostly breakfast foods (don't worry I am doing a Breakfast recipe) but I am also taking my own spin on a Classic Chicken Salad attempt that can also be a great asset to your yummy brunch spread. 

Onion & Pepper Omelette with a twist

I have always loved making omelettes mostly because it brings me back to when I was working at a bagel place and had the reigns of the grill to myself and got to experiment with so many different things. You can literally do whatever you want to make your omelette, YOURS. For example, my amazing dad (Gmac, for those of you who don't have the honor of knowing him), loves anything in his omelette... and I mean anything. BUT- the omelette itself, has to be brown and basically almost burnt because the man hates eggs. No one ever questions Gmac on his decision but just know, you can still find a way to enjoy your omelette even if you don't like eggs. Me on the other hand, I like to keep my omelette classic. I came up with my own twist and honestly haven't made one differently since. 

Ingredients:
- 2 Eggs
- 1/4 cup of chopped green pepper
- 1/4 cup of chopped onion
- 1 tablespoon of feta
- 1 teaspoon of pesto
- Litte bit of minced garlic
- Salt and Pepper to taste

Directions: 
- FIRST and foremost, you must sauté your onions and peppers together with the garlic. Drizzle some olive over them as well and make sure you cook them through. I am telling you, it makes such a significant difference in your food when you sauté them before adding them to the omelette.
-In a bowl, whisk your two eggs with a splash of water. Add a little bit of salt and pepper to taste.
-Over medium heat, pour your egg mixture in and just let it sit. As the center cooks lightly push around the edges to make sure all the liquid is being cooked. Before you flip, you want to ensure that you have a pretty solid round egg so it doesn't fall apart. 
-Once you flip, cover half of the omelette with the pesto and feta and then the onion and pepper sauté mix.
-After letting that sit for a minute or two, its time to fold....Carefully
-Let it sit for another minute or two so the insides of the omelette melt together. 
-Once finished, top with parsley and parmesan cheese if desired. 


As you can see, I had a side of homemade breakfast potatoes. They are so easy to make and can be a great compliment to your omelette. 

Ingredients:
- 5 small red potatoes
- olive oil
- minced garlic
- salt and pepper
- oregano
- basil
- onion powder
- garlic powder

Directions:
-You will need to clean your potatoes and cut off all the ugly grossness from it before you do anything. 
-Cut into bite size pieces or whatever you desire
-In a microwave safe bowl, microwave for 5 mins. After the 5 mins, take out and mix around. Then, microwave for another 5 mins. 
-In a non-stick pan, put the potatoes in with olive oil, garlic and sprinkle generously with each of the seasonings. You can add more of a particular one, it all depends on your taste buds. 
-Cook on medium heat and until the potatoes are golden and crispy. 

ENJOY!

Now, some brunch goers prefer the lunch side of things. So lucky for you weirdos, I have a great Chicken Salad Recipe that can help you get your lunch fix. 

Avocado Chicken Salad

I am a new comer when it comes to chicken salad because I HATE mayo. I literally despise it so if you don't like me, just force feed me mayo and you can enjoy my misery (or tuna fish #EW). I was browsing on Pinterest (of course) and found a recipe that used Avocado instead of Mayo so I decided to take my own spin on it. 

Ingredients:
- 1 chicken breast (seasoned how you like), COOKED
- 1 green apple, chopped into small pieces
- 1 ripe avocado
- 1/2 cup of chopped tomatoes
- 1 tablespoon of parsley
- 1/4 cup of onion, chopped (I used a sweet onion, but a red onion could work as well)
- 2 teaspoon of lime juice
- salt and pepper to taste
- 2 pieces of wheat toast

Directions:
-Make sure your chicken is finely chopped into small pieces and combine everything into a bowl (except the bread, obviously)
-Use a fork to really break up the avocado otherwise, it will look weird. 
-After generously mixing it together, serve on some wheat toast. I added an extra side of apple because obviously I'm super healthy.....


As you can see, the recipe is SUPER easy and it tastes even better! Brunch can be whatever you make it so don't be afraid to try new things. Thanks to Hayley Burns for suggesting to me to do a breakfast post! Anyway, I hope everyone enjoys their weekend and let me know if you try these awesome recipes and how it goes!!

XOXO, 
Caroline 

Monday, February 29, 2016

Gourmet Grilled Cheese, Please. 

Honestly, who doesn't love a classic Grilled Cheese Sandwich? If you don't, you have other issues we need to address but we won't get into that right now. There is something about cheese oozing between two pieces of bread that make people go crazy. And of course, there are so many renditions you can do to make your own grilled cheese unique. 

For todays post, I am going to share my two different spins on grilled cheeses and let me tell you, they are quite different. They are two different tastes, so you are bound to at least like one of them... Or I hope so.. 

Here we go with Grilled Cheese #1

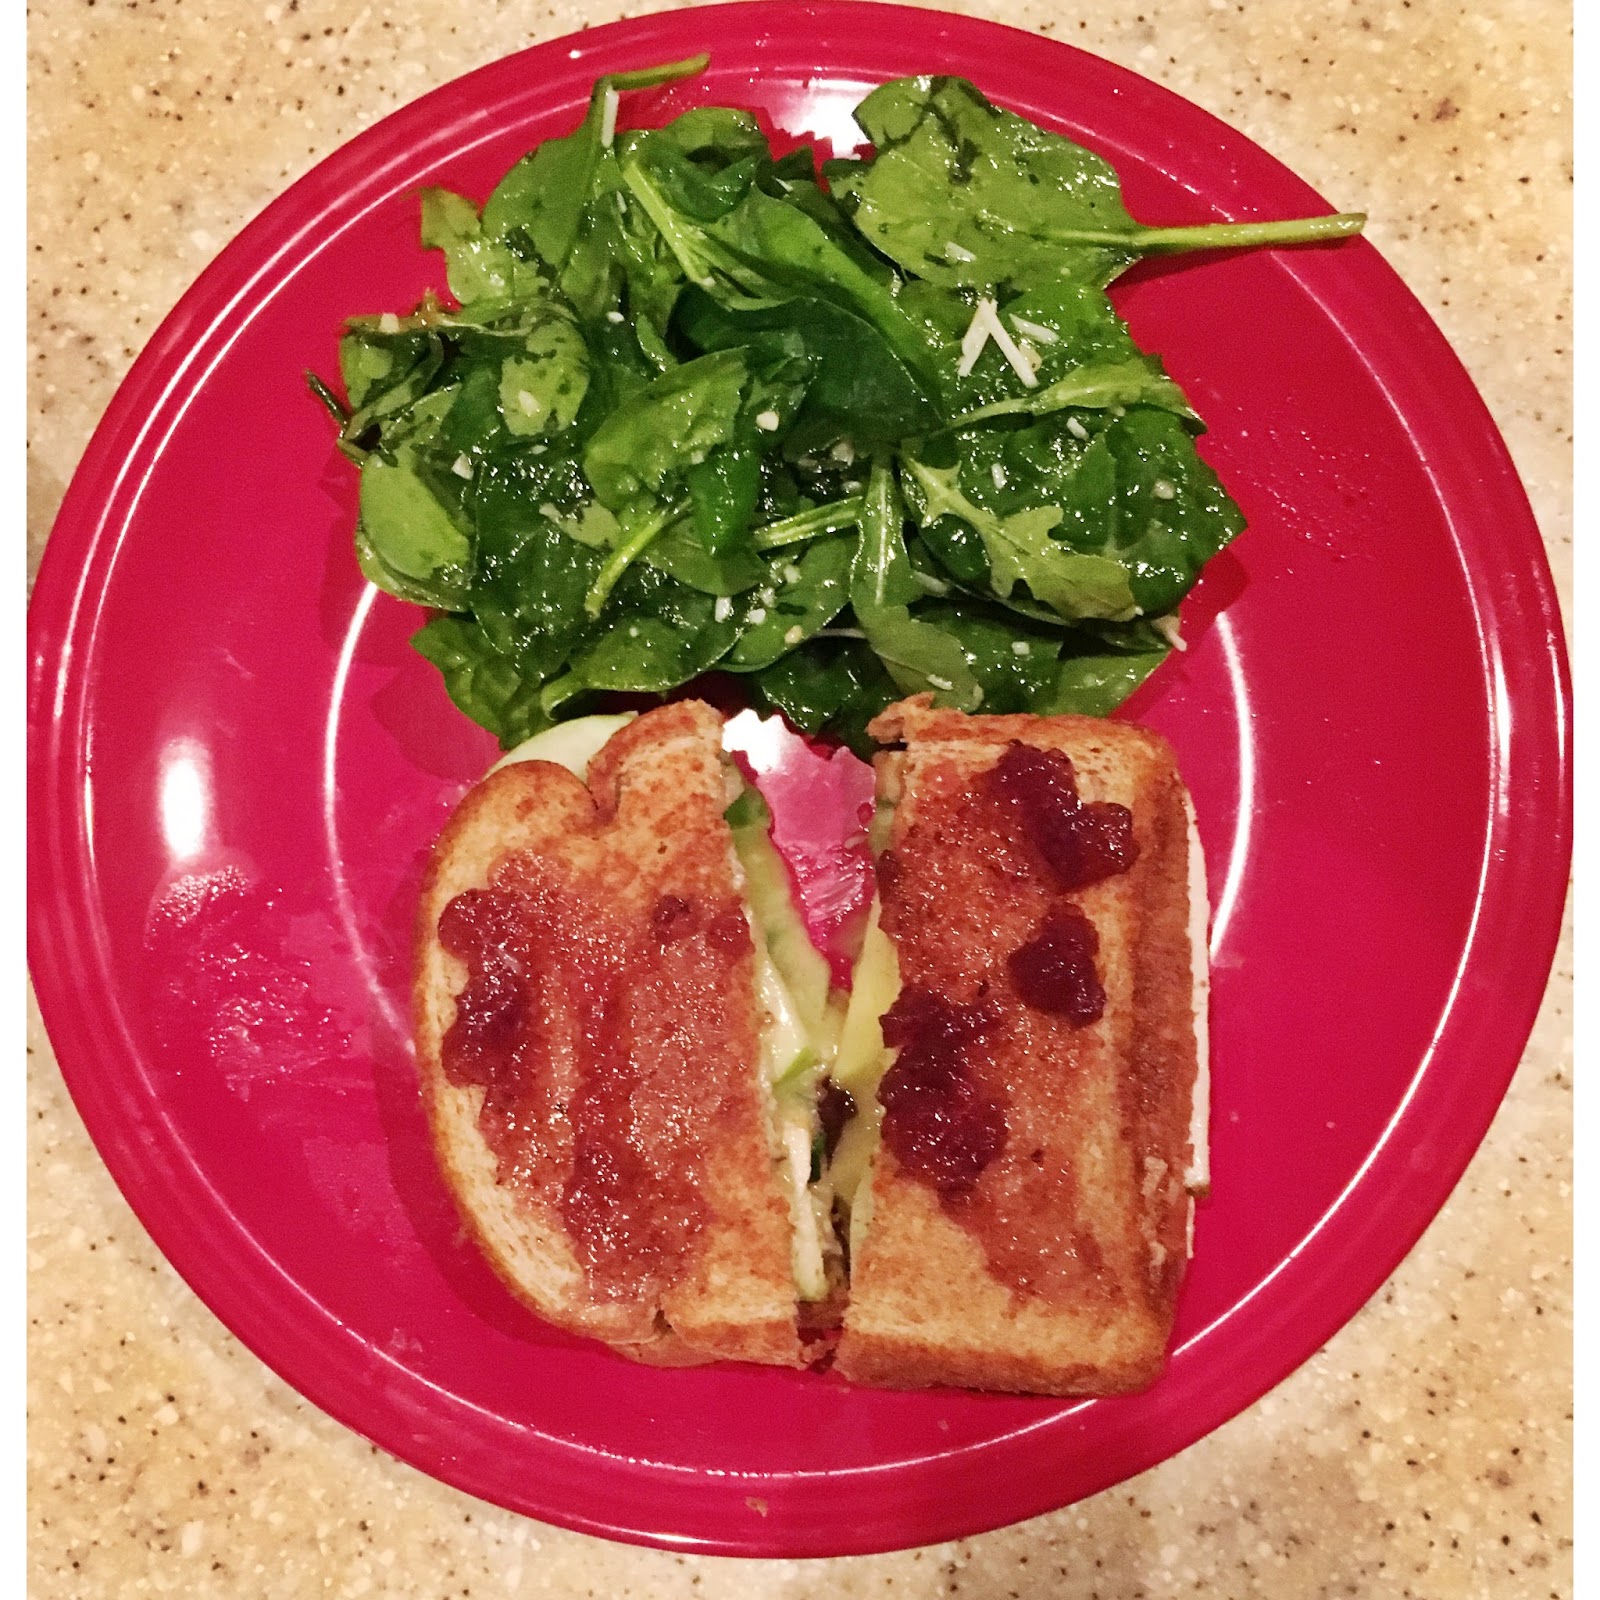
Turkey & Brie Grilled Cheese with Apple Slices and Arugula 

Yes, very overwhelming with many ingredients but the taste is out of this world. I was cooking for two this night so the recipe may be a little more than you want. Also, we each tried our own spreads to go along with it which gave it a different taste as well. 

Ingredients: 
4 pieces of wheat bread 
2-4 thin slices of turkey breast
thinly sliced brie (as much as your heart desires)
1 apple thinly sliced
1/2 cup of arugula 

Directions:
-Lightly butter one side of each slice of bread and stack all of the ingredients.
-Cook over medium heat until both sides are golden brown!
-ENJOY


In the sandwich above, I used a honey mustard glaze mixed with a little bit of more honey. It complimented the sandwich very nicely and gave it a little extra zing to it.


In Caroline Ryans sandwich, she used a raspberry jam. According to her, it was really good considering how well brie and jams go together. 

I know the salad looks tasty as well. Its so easy to make, you will eat it every night.

Ingredients:
-1 clove of garlic, minced
-1/2 teaspoon of dijon mustard
-1 tablespoon of lemon juice
-1/4 teaspoon of pepper
-1/8 teaspoon of black pepper
-3 tablespoon of olive oil

Mix all the ingredients in a small bowl and then toss in with a spinach and arugula mixture. I usually throw a little bit of parmesan cheese in there because why not. 

Buffalo Chicken Grilled Cheese

We all know everyone loves anything buffalo chicken, and this sandwich is no different. So lets get right down to business...

Ingredients:
-1 piece of COOKED grilled chicken (seasoned however you like it)
-1 1/2 tablespoon of franks hot buffalo sauce
-1/4 teaspoon of basil, dried
-1/4 teaspoon of garlic powder
-1 tablespoon of cream cheese
-1 tablespoon of shredded cheddar cheese
-2 slices of provolone cheese
-2 slices of wheat bread

Directions: 
-In a small bowl mix everything together, except provolone cheese and bread (obviously)
-Lightly butter one side of each piece of bread.
-Layer the sandwich provolone, chicken mixture, provolone.
-Cook over medium heat and until both sides are golden brown
-Serve with a small salad so you can convince yourself you are being healthy, even though you are not!


I used Caesar dressing to dip my sandwich in because my house was out of ranch, but of course that would have been my go to.

I hope you enjoyed these sandwiches, they are really easy to make! If you ever try one of the recipes I would love to hear your feedback! Also, if you ever have any suggestions you want me to do, please feel free to share! 

Lastly, Cravings with Caroline now has its own instagram so be sure to follow for pics and new postings. Thanks so much for all the support and be on the look out for next weeks post!!

XOXO,
Caroline

(Follow on instagram: @cravingswithcaroline) 


Monday, February 22, 2016

Taking on The Big Easy with a Big 'Ole Bloody 

As most of you know from my previous post, I spent my weekend in the great city of New Orleans, LA. For those of you that have never been to NOLA- you are missing out on a city that can turn from cultural and festive to drunk and ratchet just like day to night. I was excited to go to New Orleans for my boyfriends last formal, but I was also very excited to try their delicious food! Of course we got there too late on Friday night, but no worries, I managed to get myself a Lucky Dog to fill my hunger after a night on Bourbon St.

Saturday was a tough start while walking around looking for Cafe du Monde and then finding how long the line was. We gave up our hope on trying the Beignets this year (Sorry Brooke!). What's worse then a group of hungover college kids, you ask? A group of hungover HANGRY college kids (Hangry= Hungry+Angry). After stumbling down Decatur Street, we found The Corner.


The Corner seemed like a great restaurant/bar to fill our hunger needs, and they didn't disappoint. I knew I was home when I read on the menu "Worlds Best Bloody Mary's!" I'm sure you all know the saying, "The best way to cure a hangover? Keep Drinking." So we did. Unfortunately, majority of my group ordered Mimosa's but shout out to Dave for getting a Bloody with me. When I tell you this place doesn't lie- they don't. All I wanted to do was stand up and cheer "You did it! Congratulations! Worlds Best Bloody Mary! Great job everybody, It's great to be here!" But then I thought, I am not Buddy the Elf and who knows if I would have gotten kicked out, but man, it was good. 


If that isn't the most beautiful sight you've ever seen, you're doing it wrong. Not only was the blend of tomato juice mix to vodka perfect, but the blend between seasonings and spices mixed in was absolutely incredible. This bloody came with a lime, olive, and pickled okra- I just kept the lime. Most people love other garnishes in their drink, and don't get me wrong, a pickle or a piece of bacon would have been lovely, but the drink was too good to even complain. Lastly, to top it all off, the bartender had an old bay seasoning mixture to coat the rim of the cup. When & If I get back to New Orleans, I know where I will be going to get my Bloody Mary. 

While most of you are probably thinking, where is the food component? Here ya go! Our table ordered a variety of appetizers. From crab & crawfish cakes, to fried oysters, to mozzarella sticks (you're welcome, Tommy), to Alligator bites... EVERYTHING WAS DELICIOUS! I'm not going to lie, I was on Team Crab Cake & I made sure we got them. 


I am not very adventurous when it comes to seafood and I really wish I was; however, I will never turn down delicious crab cakes or crab legs. What I found most interesting is that they had mixed in Crawfish to their crab mixture before forming them into cakes and cooking them. It was topped with a Remoulade Sauce. I never knew what a Remoulade Sauce was but after looking it up just now, it was invented in France and is used in many different countries. In the US, it is traditionally used in Louisiana cuisine. It is a mayonnaise base sauce mixed with Paprika, Creole Brown Mustard, some Ketchup, and Cayenne Pepper. Feeling brave, I didn't scrape it off and I actually tried it. It was absolutely amazing. Clearly, these Cajuns have got it going on and know how to do food.

Later on, the actual formal itself was a blast and the food there was great too! I always love going to New Orleans because of the culture they have there, it truly is a one of a kind place. I am glad that on this trip I got to try some unique dishes and drinks to share with you, but of course, I ended my night with getting a slice of pizza.
We felt the need to take a picture on a random street, with our pizza. Thanks for a great time, Tommy!
If you are ever in New Orleans, be sure to check out The Corner, I promise you will not be disappointed. 

Lastly, since I didn't share any new recipes in this post, I'll be posting one later on in the week that I am dying to try. Wonder what it is? Brie is the only hint I will give you. Thanks so much for reading everyone, I hope you enjoyed my Cajun experience!!

XOXO, 
Caroline 


Wednesday, February 17, 2016

The Post That Started It All...

Okay, I'm sure most of you follow me on Instagram (or maybe I'm just thinking I have a lot of followers and really don't #awkward) BUT anyway, I posted a delicious picture the other day and it hit me, I NEED TO BLOG. So i figured my first actual food blog would be dedicated to the post that made me realize I want to do something more than just post cool Instagrams!

Prosciutto Wrapped Chicken in a Honey Glaze with an Avocado Spinach Tomato Salad Mix!

For starters, I just want to put out there that for the chicken I took an idea from a Pinterest post and added my own twist and for the salad, I took one of my mom's friends dip recipes and basically made it into a salad!

CHICKEN:
Ingredients:
-1 Chicken Breast
-1 tsp of Honey
-1/2 Clove of Garlic, minced
-Red Pepper Flakes, Salt, & Pepper
-3 Slices of Prosciutto 
Directions:
-First you are going to want to preheat your oven to 400 degrees
-Take your chicken breast and salt and pepper to taste
-Next, in a small bowl mix 1 tsp of honey. (if you are into the sweetness, add 1 1/2tsp), add 1/2 clove of minced garlic, and sprinkle some red pepper flakes.
*so you are not cutting your fingers, just use the store bought pre-minced garlic, it is seriously a life savor!!*
-After mixing your glaze, lay out 3 pieces of prosciutto and wrap your chicken in it.
-Add any of the extra glaze on top of the prosciutto and then put it on a greased pan
-Bake for 35 minutes and ENJOY! 
*Make sure to check to see if your chicken is cooked all the way through before consuming*

SALAD:
-Mix all of the following ingredients together in a bowl
-half a bag of spinach/arugula mix
-1 chopped avocado
-1/2 a package of feta
-1/2 a package of cherry tomatoes sliced in half
-1 tablespoon of olive oil
-1/2 tablespoon of red wine vinegar or balsamic vinegar (whichever you prefer!)
-1 clove of garlic, minced (you can use your store bought pre bought garlic for this too!)
-1/4 cup of chopped onion, preferably red onions
-1/2 teaspoon of dried oregano

Most of my recipes are going to be single serving but can easily be doubled or tripled! I will make sure to note if it is single serving or more. The recipe above for chicken is a single serving and the recipe for the salad could feed two but I was just really hungry so I obviously stuffed my face...

I know being in college and cooking can be tough, but one of the most important things to remember is to keep it cheap and simple but make sure your quality is A+! In due time, you will be mastering the basics of the kitchen!

Lastly, if any of y'all have any suggestions for recipes, please feel free to contact me because I would love to try new things and give you a shout out for providing me the recipe. I hope you enjoyed this delicious dish! I hope everyone has a great weekend and be on the look out for my next post all about New Orleans food and hot spots (I'm sure you can guess where I am going this weekend)

XOXO,
Caroline 


*PS- shout out to my proof reader Liv Crumbley- YOU DA BOMB (so if there are any grammatical errors or spelling errors, its not my fault....)